Found this bad boy at the LoveLady Thrift store for $26. Old stereo console. Before picture.
Simple white coat of oil paint......Yes please! :-) I found the lamps that day too, $8 for BOTH!! I added the black shades.
Friday, April 15, 2011
How to paint a painting!
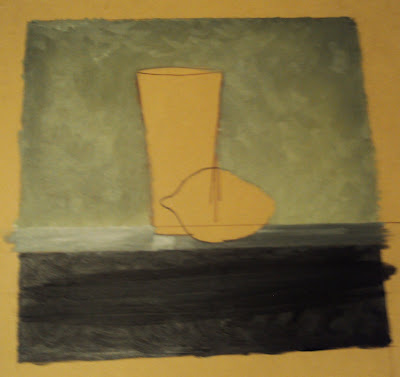
For the first step I had to choose a surface for the piece. I decided to paint on a piece of particle board that was the backing for the frame, because that is simply how I roll, lol. Then I drew out my basic shapes I wanted.
Next step was to paint the background, the surface, and the bottom of the surface. I chose a grayish brown for the background and darkened the edges, the surface was a lighter color than the background with some simple shadows and some light gray which would act as a reflection on the tables surface for the silver cup. the bottom of the table was a simple black.
I added some blues in a linear fashion to give the appearance of reflections of the objects in the room, blue will appear as light on the surface and strengthen the idea of metal on the cup!
In this step I added the Lemons reflection the the cup. Remember to "stretch" the reflection in an upward manner, getting smaller towards the top.
When I added the lemon all i had to do was paint the yellow base and add a black and a brown to the underside. Then I added a white to the top left where my light source was directed from.
Now just let it dry and frame that amazing piece of art you just made!!! ;-)
Friday, April 8, 2011
How to antique a mirror....
I wanted a mirror in my new apartment but I didn't want one that when someone walked in they knew exactly where it had come from, I wanted something different and interesting. I remembered my friend Clint has this huge mirror made up of 12"x12" mirror tiles that had been antiqued in his loft.
I wanted mine to have some sort of light interaction, maybe with candles or a picture light attached overhead or something in between to maximize the use of the mirror. I knew I needed a base of platform the attach the mirror tile to and I knew that I wanted it to have a modern sense to it as well. So, I used a basic hollow core door from home depot as my base because it had some thickness to so when it stands alone it will have some solidarity to it.
Now I wasn't sure how they actually mirrored the back of the tile so I had to ask around and Google some of it. What I found out is that the mirror tiles have a coat of gray paint on the back to protect the mirror below, so you have to use an aerosol stripper of easy off oven cleaner to remove the paint. Once you've done that your ready for the mirror antiquing. This is done with a product called Muratic Acid that they use to clean concrete and pools, (you should be able to get it from your local Home Depot) THIS IS SERIOUS STUFF!!! It will clear you out of a room in 2 seconds, promise!! Lol. So use gloves and make sure your space is ventilated well. Spray the acid on the back of the mirror and let it sit for about 35 minutes to start, you might need to let it sit longer depending on the look you want. Here is a before and after picture of a mirror tile.
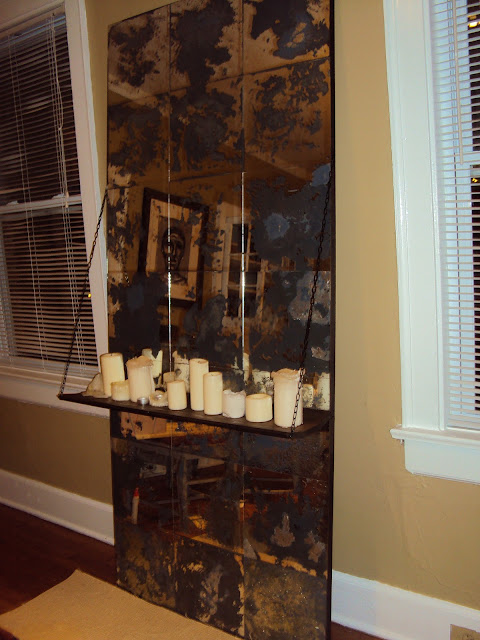
I attached all the mirror tiles with liquid nails to the door frame.I purchased some chain, slat of wood, and some screws. I stained the edges of the door in a walnut stain and the plat form for the candles. added some screws and done. You've got an amazing one of a kind mirror! ;-)
The best is at night with the lights in the apartment dimmed and the candles lit, with a glass of wine of course! ;-)
Tuesday, April 5, 2011
Trash to Treasure!
When I moved into my own apartment not too long ago, I realized that what I once thought was too much furniture was all of a sudden not enough and not enough by a long shot! I needed a dining room table, chairs, rugs, console tables, art, lamps and most importantly the stable of any household.....a Sofa! I looked online for one everywhere but there was no way I was going to be able to fork up $2000 for a sofa, or anything else for that matter. So I got the idea from a friend to find one at a flea market that had the lines and simply have the upholsterer to change the parts of the sofa that I didn't like!!
This is the sofa I really wanted! This amazing piece my boss has at the office, he had it designed a few years back.
One day on the way to my friends house I was sitting in my car waiting for the gate to open and it hit me!!! Right behind me was this sofa....
.This sofa that had been sitting by a dumpster by a back lot that was adjacent to me. I had seen this sofa sitting there for several months, at least once a day. I instantly remember my friend telling me about how the upholster could change the lines to my liking. I had the sofa picked up that night and delivered to the upholsterer a week later. I purchased a mink colored velvet off a website for $200 for 17 yards. One LONG month later I had my very own custom, knole inspired sofa with nailhead trim and bolster pillows that you see below!!!!! Couldn't be happier with it, What is one man's trash is another man's SOFA!! ;-)
Where do I put my Martini???
One of my favorite stores to go to is Circa Interiors in Mountain Brook Village, they have a wonderful mix of old and new that marry together beautifully with the use of neutral colors and simple lines. I found these wonderful little martini tables designed by Bobby Mcalpine called the Altar Boy table and instantly thought to myself "I can make something like that!!"
I knew I had a piece of left over wood that could act as the neck of the table. I went to Hobby Lobby and found a small base and top for my table, which only cost me about $9.
I wanted the table to be about the height of a low sofa arm or a side chair so, I had to cut the long piece down to about 24". I wanted the base piece to be longer than the top and in order to bring a morn modern flair to the piece, I attached the neck of the piece to the far left side of the base.
I attached the top and base to the neck with some nails and wood glue, added some wood stain and all of a sudden I have to perfect little drink table for a sofa or arm chair that takes up little or no space!! How great is that!! ;-)
Subscribe to:
Comments (Atom)


